Interface Overview
Envelope Display
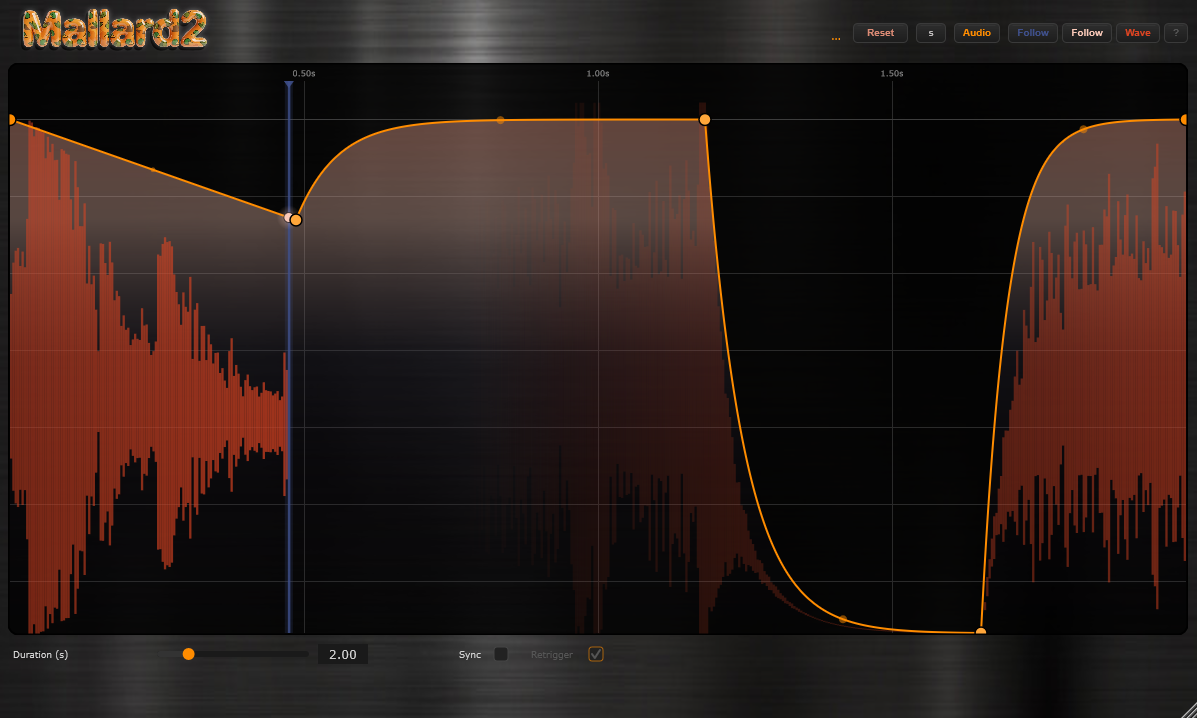
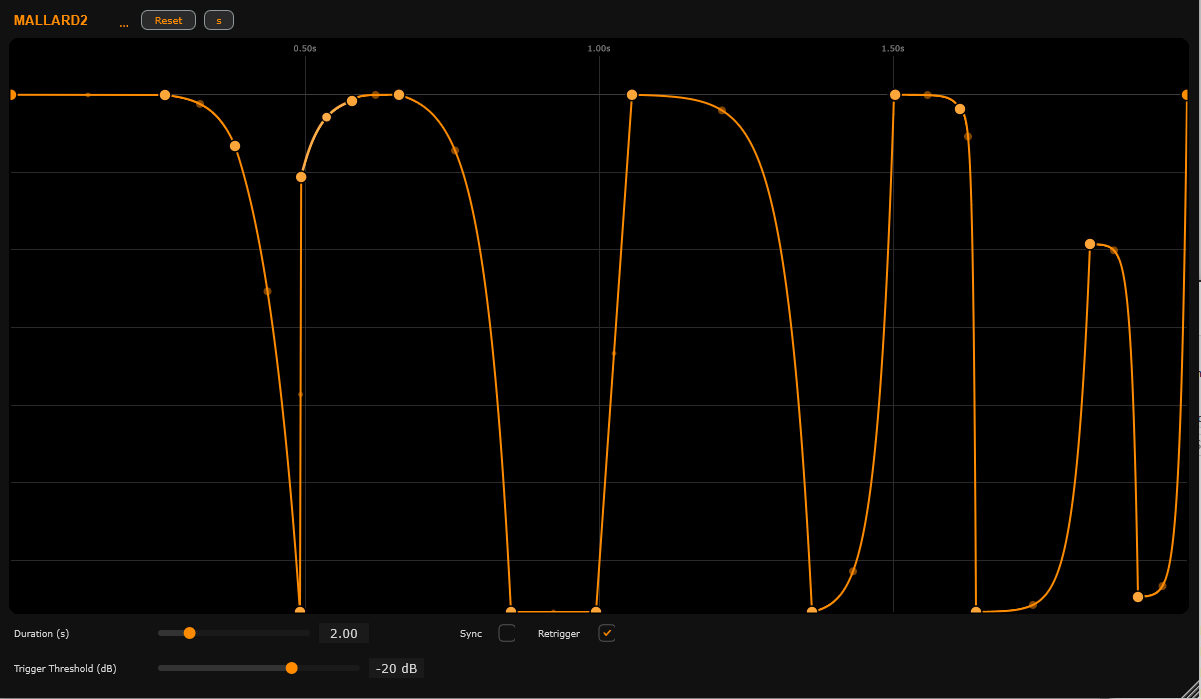
The large center graph is the heart of Mallard2. It shows the amplitude envelope that will be applied to your audio — the vertical axis is gain (0 at the bottom = silence, full height = unity) and the horizontal axis is time (one full cycle, left to right).
Double-click anywhere on the display to add a new control point. Double-click an existing point to remove it. Drag points to reshape the envelope. Drag the line between points to curve it — pulling the line between two points bends the segment into a smooth arc.
Three optional overlays display in real time as audio plays: a blue playhead line shows the current position in the cycle, an orange dot tracks the envelope value at that position, and a red waveform trail shows the peak level of the processed audio across the envelope. Toggle each with the Follow Line, Follow Dot, and Wave buttons.
Core Controls
Mode Toggles
Sidechain Section
The Sidechain section has three exclusive options that determine what triggers the envelope. The status bar across the bottom of the envelope display reports the current mode and whether a signal is being received.
Presets
The preset dropdown in the top bar loads immediately on selection — no separate Load button needed. Init is always the first entry and resets everything to factory defaults. Click Save to name and save your own preset. Click Del to remove the selected preset. User presets are saved as .m2preset files in Documents/MallardAudio/Mallard2/Presets/ and appear automatically next session.
Mode Combinations Explained
Loop Mode (Shot off, Sidechain off)
The envelope runs continuously from left to right and wraps back to the start the instant it finishes. It starts the moment the DAW transport starts and stops when the transport stops. When the transport is stopped, Mallard2 passes audio through completely unchanged — you can still hear your instruments while designing sounds.
This is the mode for rhythmic volume effects that stay locked to musical time. Draw a pattern — for example a four-beat swell — set Duration to match your bar length and the effect repeats perfectly in time.
One-shot Mode (Shot on, Retrig off, Sidechain off)
The envelope plays once when triggered and then holds at the final value of the drawn curve. It does not loop. While the envelope is running, the trigger LED glows orange. Once it finishes, the LED goes dark and Mallard2 holds whatever gain value is at the right edge of your envelope until a new trigger arrives.
With Sidechain set to Off, the main audio input itself acts as the trigger source — Mallard2 fires when audio from the track exceeds the Threshold. This is useful for envelope follower-style effects where the audio's own attacks shape the output.
With Retrig off, a second trigger that arrives while the envelope is still running is ignored. The envelope finishes its current cycle before it can fire again.
One-shot + Retrigger (Shot on, Retrig on, Sidechain off)
Retrigger adds a crucial behavior: a new trigger resets the envelope to position zero immediately, even if it is currently mid-cycle. This means rapid triggers produce rapid restarts rather than waiting for the previous cycle to end.
This combination is the most expressive for rhythmic gating. Drive it with a MIDI pattern or a punchy sidechain and each hit restarts the envelope from scratch, so the shape of your envelope always starts from the same point on each note. Without Retrigger, overlapping notes would let the envelope run to completion before it can fire again — with Retrigger, every note gets a fresh attack from the envelope's start.
Sync + Loop (Sync on, Shot off)
Enabling Sync in Loop mode locks the envelope to the DAW beat grid with sample-accurate precision. Duration is replaced by the Sync Division control — choose 1/16, 1/8, 1/4, 1/2, 1 bar, 2 bars, or 4 bars. The envelope recalculates its cycle time in real time from the DAW's BPM readout.
The blue playhead line follows the DAW cursor even when the transport is stopped, so you can scrub through a session and see exactly where in the cycle you are at any position. This mode is ideal for production use where you need the effect to lock perfectly to the grid and stay there even if you change tempo.
All Mode Combinations — Quick Reference
| Sync | Shot | Retrig | Sidechain | Behavior |
|---|---|---|---|---|
| Off | Off | — | Off | Free loop — envelope runs continuously while transport plays. Duration set in seconds. |
| On | Off | — | Off | Synced loop — envelope locks to beat grid. Tempo changes update the cycle automatically. Best for production. |
| Off | On | Off | Off | One-shot, no retrigger — fires on main audio threshold crossing. Ignores new triggers mid-cycle. Holds end value after finishing. |
| Off | On | On | Off | One-shot, retrigger — resets to start on every threshold crossing, even mid-cycle. Most responsive to fast or irregular input. |
| Off | On | Off | Audio | Audio sidechain, no retrigger — fires once on the rising edge of the sidechain. Waits for the cycle to end before a second trigger can fire. Good for kick-drum gating where you don't want the hit to restart. |
| Off | On | On | Audio | Audio sidechain + retrigger — every loud transient from the sidechain restarts the envelope from zero. Punchy, reactive. Use with a tight kick or clap pattern for rhythmic gating that follows the groove exactly. |
| Off | On | Off | MIDI | MIDI sidechain, no retrigger — each note-on fires the envelope once. A second note-on while the envelope is running does nothing. Good for pads where each note gets a single timed swell. |
| Off | On | On | MIDI | MIDI sidechain + retrigger — every note-on resets the envelope. Playing a fast melody causes rapid restarts. Staccato playing produces sharp repeating shapes; held notes let the envelope complete. The most musical one-shot mode. |
| On | On | On | MIDI | Synced one-shot + MIDI retrigger — envelope length is beat-locked, but each MIDI note-on resets position to zero. The shape is rhythmically proportional; timing snaps to the grid. |
Sidechain Routing
Routing an Audio Sidechain
Mallard2 accepts a second stereo audio bus as its sidechain input. This is typically a kick drum, snare, or any rhythmic audio source you want to use as a trigger. The plugin watches for rising-edge threshold crossings on that bus — the main audio is not affected by the sidechain bus itself, only the trigger timing comes from it.
- Place Mallard2 on the track you want to process (e.g. a synth pad).
- On the track you want to use as the trigger (e.g. kick drum), set its Audio To output to the Mallard2 track.
- In Mallard2's device view, click the triangle to expand the device and find the Sidechain button. Enable it.
- Set the Audio From dropdown in the sidechain panel to the kick drum track.
- In Mallard2, click Audio Sidechain in the Sidechain section. The status bar should read Enabled Audio in green when signal is arriving.
- Place Mallard2 on the channel strip of the track to be processed.
- In the plugin header, click the small Side Chain dropdown (top-right of the plugin window).
- Select the bus or track you want to use as the trigger source from the list.
- On the trigger source track, set its output to send to that same bus (or leave it on its own channel if selecting the track directly).
- In Mallard2, click Audio Sidechain. The status bar should confirm signal is arriving.
- Place Mallard2 on a Mixer track for the audio you want to process.
- On the Mixer track that will carry the trigger signal (e.g. kick), find the Sidechain section at the bottom of that track's channel and enable the Mallard2 track as a sidechain destination.
- In the Mallard2 plugin window, click Audio Sidechain in the Sidechain section.
- The status bar will confirm Enabled Audio once signal is routed correctly.
- Place Mallard2 on the FX chain of the track to be processed.
- In Mallard2's FX chain entry, click PDC / the routing icon to open the plugin's I/O routing dialog.
- Mallard2 accepts channels 3+4 as its sidechain bus. Route the trigger source track to those channels via Reaper's track send system: on the trigger track, add a send to the Mallard2 track and set it to go to channels 3/4.
- In Mallard2, click Audio Sidechain. Signal should appear on the status bar.
Routing a MIDI Sidechain
In MIDI Sidechain mode, Mallard2 triggers on any MIDI note-on it receives. No pitch or velocity filtering — any note fires the envelope. This lets you draw a MIDI pattern in your DAW's piano roll (or play live from a keyboard) and have Mallard2 follow it exactly.
- Place Mallard2 on the audio track you want to process.
- Create a separate MIDI track in the session — this will carry your trigger pattern.
- On that MIDI track, set MIDI To to the Mallard2 audio track and choose Mallard2 from the instrument dropdown.
- Draw notes in the MIDI track's clip (pitch doesn't matter — just note timing).
- In Mallard2, click MIDI Sidechain. The status bar will show Enabled MIDI in blue once a note-on arrives.
- Place Mallard2 on the audio channel strip you want to process.
- Create a new External MIDI track or use an existing Software Instrument track.
- Use Logic's MIDI Environment or a MIDI Cable trick to route MIDI output from that track into the audio channel hosting Mallard2. Alternatively, place Mallard2 on an Instrument track and route audio from your source through a bus into that track's input.
- In Mallard2, click MIDI Sidechain and play or sequence notes. The status bar confirms receipt.
- Place Mallard2 on a Mixer track for the audio you want to process.
- In the Piano Roll, create a pattern with notes at the timing you want the envelope to trigger.
- In the Channel Rack, set the MIDI output of that pattern's channel to target the Mallard2 VST instance (this requires that Mallard2 is loaded in the Channel Rack as a VST effect, with audio routed through it via the Mixer).
- In Mallard2, click MIDI Sidechain.
- Place Mallard2 on the FX chain of the audio track to process.
- Create a new track and add a MIDI item with your trigger pattern. Set that track's output to the audio track hosting Mallard2.
- In Reaper's routing, ensure MIDI is sent to the Mallard2 FX slot (Reaper sends MIDI to all FX on a track by default when MIDI is routed to that track).
- In Mallard2, click MIDI Sidechain. The status bar will pulse blue and show "Enabled MIDI — waiting for note-on" until a note arrives, then switch to steady Enabled MIDI.
Common Use Cases
Rhythmic Trance Gate (Loop + Sync)
Enable Sync, set division to 1/4, leave Shot off. Draw a choppy envelope — high-low-high-low across one bar. Set Smooth to 0 ms for hard edges. The gate repeats on every beat and locks to the grid perfectly even if you change tempo mid-session. Use Mix to blend in some dry signal underneath to keep the track audible between chops.
Kick-Triggered Ducking (Audio Sidechain + One-shot + Retrig)
Route your kick drum to Mallard2's audio sidechain. Enable Shot and Retrig. Draw an envelope that dips down sharply at the left and recovers back to full gain over the right portion — like an inverted exponential curve. Set Duration to around 200–400 ms.
Every kick hit restarts the envelope, ducking the pad or bass below it instantly and then smoothly recovering. This is sidechain compression via envelope shaping — you control exactly how the volume responds rather than a compressor's attack and release curves.
MIDI-Keyed Volume Swells (MIDI Sidechain + One-shot + Retrig)
Route a MIDI pattern or keyboard to Mallard2. Enable Shot and Retrig. Draw a slow fade-in from silence to full gain. Set Duration to 1–3 seconds. Each MIDI note-on triggers a fresh swell from zero — playing notes quickly creates stacked attack shapes, playing slowly lets each swell complete before the next.
Combine with Smooth at 5–10 ms so the initial attack doesn't click, and Sync on with a whole-bar division to keep long swells anchored to the grid even when triggered at different times.
Envelope Follower (One-shot, Sidechain Off)
With no external sidechain, Mallard2 uses the main input audio to detect threshold crossings. Enable Shot and Retrig. Set Threshold low enough that the track's natural signal level triggers it reliably. Draw a decay shape — full gain at the left, trailing off to silence on the right.
Every transient in the audio restarts the envelope, shaping each note or hit with a consistent timed decay. This is particularly effective on drums or plucked instruments where you want to sculpt the sustain tail precisely.